Showing posts with label gardening. Show all posts

Wednesday, May 9, 2012

Garden Update

It's been a week since I got home from my trip to Utah, but I have still not gotten use to how big the cucumbers in my DIY Earthbox have gotten. Remember what they looked like a month ago when I last updated?


I had added some cages and the plants started getting some tiny blooms right before I left.


Last week I came home to this: 


It is huge! Dan said that it is so heavy it fell over one night after some really high winds. It's a daily battle to keep the tendrils out of the screen, too. There are a few little cucumbers on it. 


Since we have the plant on our screened in patio, we have to hand pollinate the flowers. The variety of cucumbers that I planted have male and female flowers, instead of male and female within the same flower. Male flowers are attached right to the vine while female flowers have a tiny, undeveloped cucumber behind them. If the female flowers are not pollinated, the cucumber won't grow. 

female

male
Since we have so many more male than female blossoms, we've been pulling the male flowers off, stripping them of their petals and rubbing the pollen directly from the stamen into the center of the female bloom. 

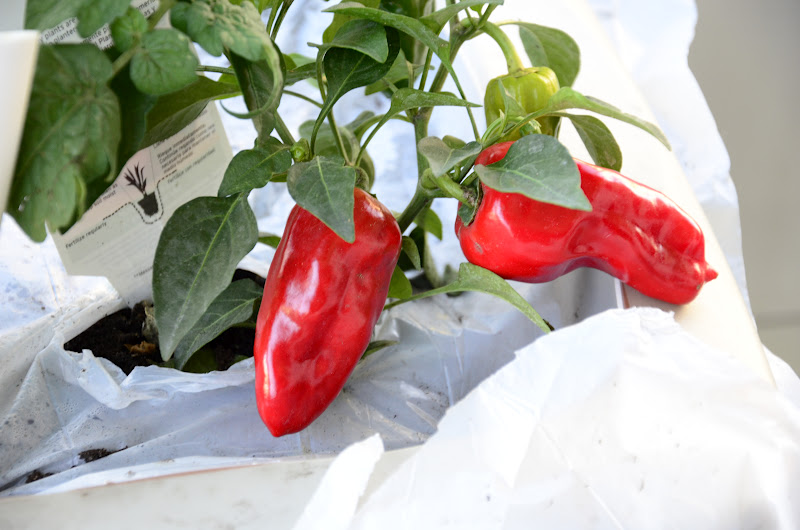
Now for the sad garden news, the basil plant died. The pepper plant isn't looking so good either, but it is still producing. The tomato and spinach plants are producing like crazy though. Dan got 26 tomatoes and 2 cups of spinach while I was gone. The spinach might be on its way out though, it has gotten freaking hot. 


Monday, April 2, 2012

Garden Update

Review how I built the DIY garden boxes (Earthbox) here and here.

I love my little patio garden. It is really starting to take off. My tomato plant got so big that I had to cage it.


The cucumber plants are doing well, too. I pulled one up that was struggling a bit, but I definitely planted too many in the box. They are starting to get the curly little tendrils so I need to figure out some kind of trellis system.


The zucchini squash has also blossomed. Zucchini blossoms are either male or female and have to be hand pollinated since bees and butterflies cannot get inside of my patio. So far all 3 blossoms are male and won't produce squash.


The spinach plants were getting enough leaves that I was able to harvest them for Dan and I to have a salad.
Before
After

I love The Pioneer Woman's Spinach Salad. Dan claimed all of the mushrooms, so mine didn't have any.  I've made this salad before, but it was even better with garden fresh spinach.

Friday, March 23, 2012

DIY Garden Box (aka EarthBox) part 2

Building the garden box was the hard part, not that it was difficult at all. Filling it up is easy and I love the garden center at Lowe's. I spent a long time reading the backs of seed packets and the inserts in herb and vegetable pots.  

Materials: 
64 quart bag of Potting Mix (Potting mix, not potting soil or regular dirt. This is very important!) 
2 cups Fertilizer (Any normal mix of fertilizer is fine. I used 10-10-10.) 
Garbage bag (White works best here in Florida. Blacks ones cause the soil to get too hot and kill the plants.) 
Plants! Yea! 

Time to get dirty. 


First, move your box to where you want it to live. It gets really heavy really fast.

You will need damp potting mix. I had a watering can handy and would wet the potting mix as I dumped it in. Start by filling, but not packing, the 2 soil tubes. Once your box starts getting full, add the soil so that it creates a ditch lengthwise across the box.


After all the soil is in, spread about 2 cups of fertilizer in the ditch that you created. You don't have to measure, just approximate.


Spread the plastic garbage bag across the top of the box and secure with the leftover outer ring of the lid. This keeps bugs and weeds out of the soil and prevents water from evaporating from the potting mix.


Cut X's into the trash bag where you want your plants to go. I found this link from the EarthBox site very helpful. My boxes are slightly larger, so I planted an extra row or so. Plant you plants in the X's.


Using a funnel, fill the box with water through the PVC pipe. Once water starts to trickle out of the hole you drilled in the box, it is full. The water will wick up the potting mix through the soil pipes and water the plants. Some plant roots may even grow through the soil and holes in the lid and directly into the water.

That's it! Keep the water topped off for the first couple of day. After that, water as needed. I water mine every 3 days or so. It doesn't take much to fill the box with water since the plastic keeps it from evaporating.

Here is my little garden. In 1 box I have a cherry tomatoes, sweet heat peppers, zucchini squash and basil In the 2nd box I planted 8 cucumber plants. This is way over the recommended amount, but I sprouted my own plants from seeds and didn't want them to go to waste. I'll not use the entire seed packet next year! In the last box I have 10 spinach plants. (I also have a peppermint plant. Apparently they will completely take over a garden box and are not recommended, so I have it planted by itself in a large flower pot on my patio table. I'm out here now and it smell delicious.  )

They are all thriving so far. We have already eaten a few cherry tomatoes and a pepper.


Since this picture was taken, I've actually rotated the boxes so that the PVC pipes are in the back. Liam loves to pull on them and it would be really bad if he pulled one out. Happy gardening! 

Wednesday, March 21, 2012

DIY Garden Box (aka EarthBox)


I'm attempting to garden this year. As I may have mentioned before, our yard is watered with reclaimed water. This means that I have to garden on my patio. I tried a few years ago, but I didn't do a good job of watering and fertilizing the plants. It was a total failure. 

At the beginning of March, I attended a Relief Society conference. One of the classes was building a self-contained garden box, the DIY version of the EarthBox brand. I loved it and planted tomatoes, zucchini squash, green onions and peppers right away. At that point, I was totally bitten by the gardening bug and set out to build a couple more boxes. 

I took photos as I went and am going to try to write some instructions. There are plenty of different methods and materials you can use by searching the internet for "DIY EarthBox." 

Materials: 
18 gallon bin & lid (Use a dark color, not clear. Also check the recycling number on the bottom of the tote. Most bins are made of #5 plastic. #1, #2, #4 and #5 are safe to use. #3, #6 and #7 contain BPA that can leach into your food.) 
4 inch wide drainage pipe (It looks like PVC, but has holes in it. You will need a length of 45 inches for each box.) 
PVC pipe (Any width between 3/4in and 1.5in is fine. You need about 27 inches or 4 inches taller than your bin.) 
14 Zip ties 

Tools: 
Box cutter or sharp pocket knife 
Hand/Jig/Table Saw 
Drill with 1/4in bit

Using the box cutter, cut the lid. Mine had a lip around the outside of the lid. I cut just outside of that and it fit perfectly. 


Cut the 4 inch drainage pipe into 9 inch sections. You will need 5 total. Also cut the PVC pipe to about 27 inches. It doesn't have to be exact, but at least 4 inches taller than your box. Also, one end of the PVC pipe needs to be angled. Again, it doesn't have to be perfect, but a 45 degree angle is the goal.

I was making 2 boxes, so I have 10 pieces of drainage pipe and 2 lengths of PVC.  
Mark circles onto the inner piece of the box lid. We want the PVC pipe to go through the lid, but the lid to sit on top of the drainage pipe, so trace the outside of the PVC pipe and the inside the the drainage pipes. The 5 pieces of drainage pipe should be in a pattern like a 5 sided dice. The PVC pipe goes on the bottom between the 2 lower circles.


Cut the top 2 drainage pipe circles and the PVC circle out. Dan used his drimmel tool, but your box cutter will work just fine. Remember to cut inside the drainage pipe circles and outside the PVC pipe circle. These top 2 circles are your soil circles, the 3 that are not cut out are support circles. Drill 1/4in holes at 4 points around your soil circles. Drill 2 pairs of holes for each support circle: one on the inside of the circle, one on the outside. These are the holes through which you will attach the drainage pipe with zip ties.

See the plywood under the lid? That's to protect my patio table. It's a good idea. 

To make sure the soil gets fresh air, drill 1/4 inch holes all of the lid, including inside your support circles.

In 3 of the pipes, drill 2 holes across from each other at the top of the pipe. These are your support pipes. In the other 2 pipes, drill 4 holes. These are your soil pipes. These pipes also need a couple more holes in them to allow lots of water into the soil, so drill a few extra holes in them down the length of the pipe. Attach the pipes to the lid using the zip ties.


I found it easier to loosely attach the pipes until I got both (or all 4 in the case of the soil pipes) in place, then I tightened it. Cut off the excess of the zip ties. 

This is turned around from the previous pictures. Don't let it confuse you.

Set the lid inside of the box.


Drill a hole in the side of the box, just below where the lid sets inside of it. 1/2in drill bits are the right size, but I don't have one so I used 1/4in and it works just fine. You can tell where the lid sets by looking for its shadow or by pressing on the side of the box. This is how you prevent over-watering in your container garden.


Slide the PVC pipe into its hole so that the angled end is down. This helps keep the PVC pipe clear and prevents it from clogging against the bottom of the bin.


That's it as far as the construction of the garden box goes. I'll write another post this week on how I filled my gardening boxes. Does Friday work for you? Read Part 2 here.